

Defensive Gear Survivalist Kit: What You Need to Know
A defensive gear survivalist kit is a pre-assembled collection of tools and supplies built specifically for self-protection and survival in emergencies, high-threat environments, or rugged wilderness conditions. Unlike a general household emergency kit, this type of kit prioritizes both physical defense and core survival functions. The term “survivalist kit” is the recognized industry standard, while “defensive gear survivalist kit” signals the added emphasis on conflict avoidance and personal protection tools. At its core, a well-built kit includes a fixed-blade knife, fire-starting tools, trauma medical supplies, shelter materials, and water filtration. Fs9tactical builds gear around exactly these priorities, serving over 20,000 survivalists who need equipment that holds up when conditions turn serious.
What are the essential components of a defensive gear survivalist kit?
A standard 72-hour survival kit includes a 3–4 inch full-tang fixed-blade knife, fire-starting tools such as a ferro rod and lighter, navigation tools, emergency shelter, and medical supplies. These are not optional additions. They are the non-negotiable foundation of any kit worth carrying.
Fixed-blade knives
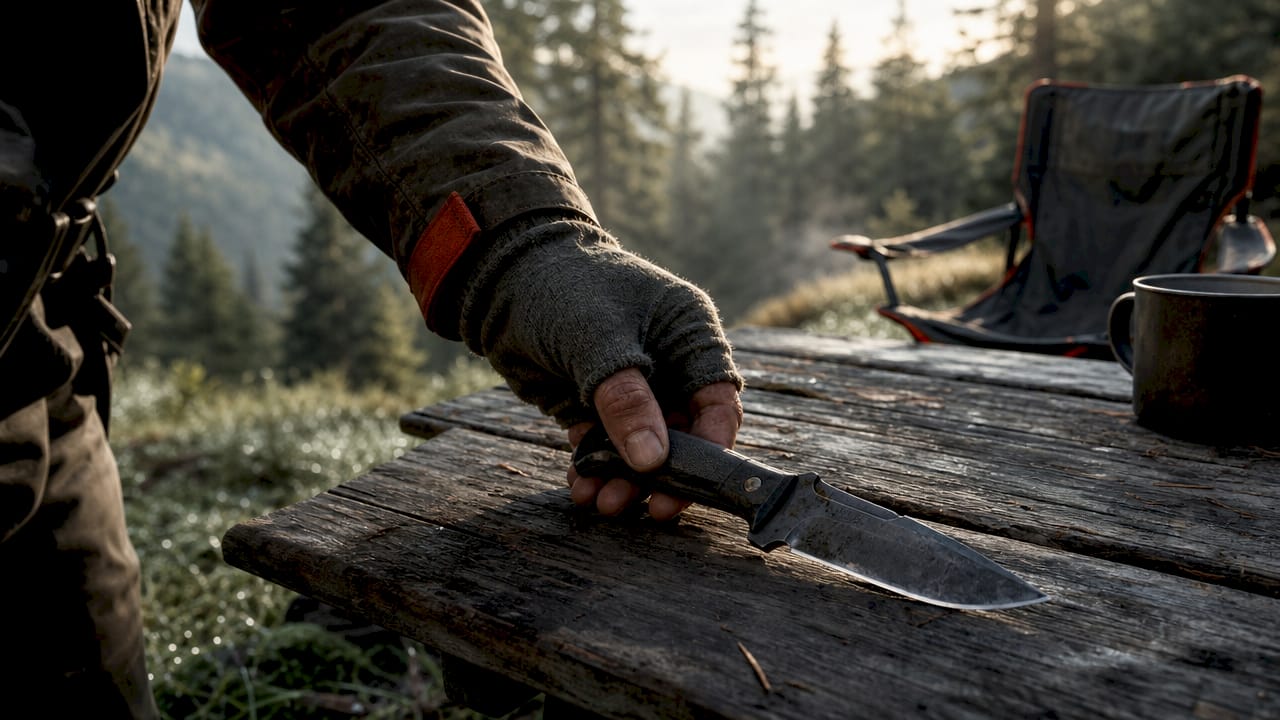
A full-tang fixed-blade knife is the single most versatile tool in any survivalist kit. It handles chopping, food preparation, shelter building, and serves as a last-resort defensive tool. Quality knives and fire starters cannot be adequately improvised in the field. Every other item in your kit can be substituted or fabricated from natural materials. A knife and a fire starter cannot.
Fire-starting tools
Carry at least two fire-starting methods. A ferro rod works wet and lasts thousands of strikes. A butane lighter is faster in calm conditions. Waterproof matches serve as a third backup. Redundancy here is not paranoia. It is standard practice for anyone who has spent time in wet, cold environments where hypothermia sets in within hours.
Medical and trauma supplies
Trauma supplies separate a defensive kit from a basic camping pack. Your kit needs a tourniquet, hemostatic gauze, chest seals, and a compression bandage at minimum. A standard first aid kit with antiseptic wipes, adhesive bandages, and pain relievers rounds out the medical layer. Survivalists who carry firearms or operate in conflict-prone areas treat trauma gear as the highest-priority category in the kit.
Shelter and water filtration
An emergency bivy or compact tarp weighs under a pound and prevents hypothermia in any season. Water filtration, through a filter straw or purification tablets, addresses the most immediate survival threat after injury. Dehydration degrades decision-making faster than almost any other physical stressor.
Pro Tip: Pack your trauma kit in a bright-colored pouch separate from everything else. Under stress, you need to find it in under three seconds.
Here is a quick reference for the must-have defensive gear categories:
- Fixed-blade knife (full-tang, 3–4 inch blade)
- Fire-starting tools (ferro rod, lighter, waterproof matches)
- Trauma kit (tourniquet, hemostatic gauze, chest seals)
- Standard first aid supplies
- Emergency shelter (bivy or tarp)
- Water filtration (filter straw or purification tablets)
- Navigation tools (compass and paper map)
- Multifunctional tool or multi-tool
- Paracord (at least 50 feet)
- Signaling device (whistle or mirror)
How does a defensive gear survivalist kit differ from standard survival kits?
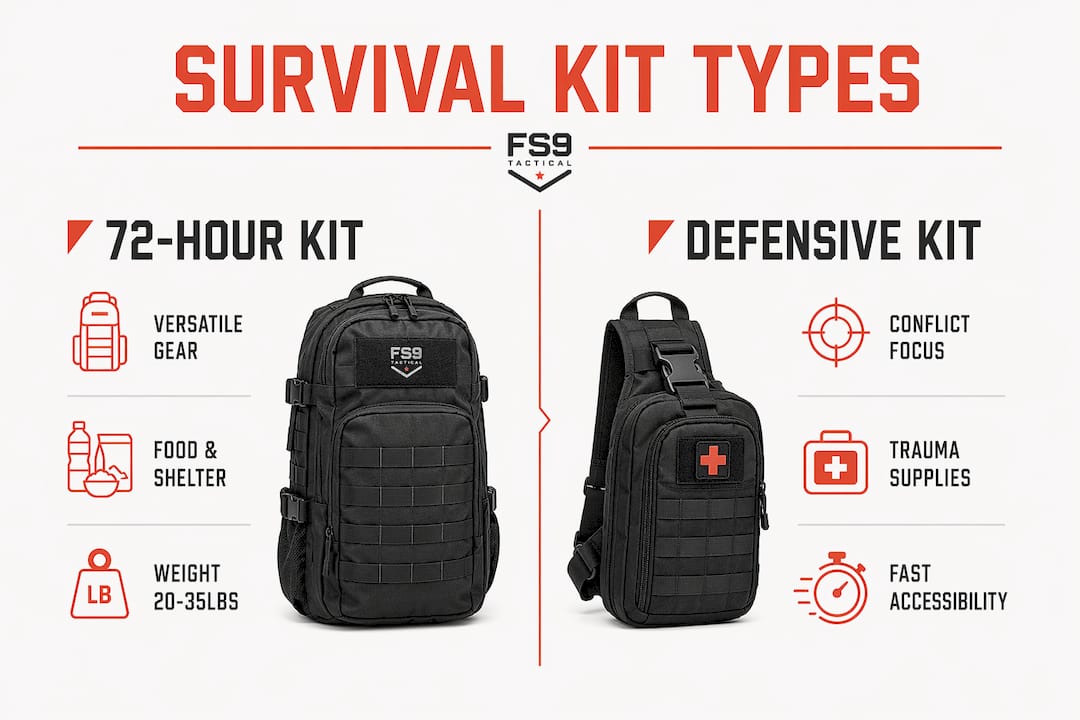
Not all survival kits serve the same purpose. Understanding the differences helps you build or buy the right one for your actual threat environment.
| Kit Type | Primary Focus | Typical Weight | Best Scenario |
|---|---|---|---|
| 72-hour survival kit | Broad disaster preparedness | 20–35 lbs | Natural disasters, evacuation |
| Bug-out bag | Extended mobility and sustainment | 25–40 lbs | Long-distance evacuation |
| Daily carry kit | Minimal essentials for everyday carry | Under 2 lbs | Urban commuting, short trips |
| SCARE kit | Conflict avoidance and self-defense | 10–20 lbs | Civil unrest, high-threat areas |
SCARE kits focus on defensive survival gear designed for conflict avoidance during civil unrest. They prioritize trauma kits and defensive tools over general disaster supplies. That distinction matters. A standard bug-out bag loaded with food and water is the wrong tool when your primary threat is civil instability rather than a hurricane.
Weight is a critical variable that most survivalists underestimate. A 72-hour kit should stay between 20–35 lbs to maintain mobility and avoid exhaustion during evacuation. Exceeding that threshold turns your survival asset into a physical liability. A kit you cannot carry at a sustained pace is a kit that fails you.
Urban instability and wilderness emergencies also demand different gear priorities. In an urban scenario, conflict avoidance tools, communication devices, and cash matter more than a water filter. In a wilderness emergency, fire-starting tools and shelter take top priority. The best survivalists build modular kits they can adjust based on the environment they are entering.
Organization and accessibility are just as important as the items themselves. Color-coded and labeled compartments improve speed and efficiency under high-stress, low-visibility conditions. A kit where every item has a fixed location is a kit you can use in the dark, under pressure, without thinking.
How to choose and organize defensive gear for maximum effectiveness
Choosing quality over quantity is the single most important principle in kit assembly. A full-tang fixed-blade knife serves chopping, food prep, and self-defense roles better than three specialized single-purpose tools. Every item you add should justify its weight with multiple functions.
Pro Tip: Audit your kit every six months. Replace expired medications, test your fire starters, and check that batteries in flashlights and radios still hold a charge.
Follow these principles when assembling or refining your kit:
- Set a weight limit before you start packing. Experienced survivalists keep 72-hour kits at 20–35 lbs. Write that number down and weigh your pack as you build it.
- Use color-coded pouches for fast access. Red for trauma, blue for water and filtration, green for fire and shelter. You will find what you need faster when color does the work.
- Label every compartment. Under stress, your brain defaults to the simplest cues. A label removes one decision from a moment when decisions cost time.
- Practice with your kit before you need it. Set up your shelter in the backyard. Start a fire with your ferro rod in the rain. Use your tourniquet on a training dummy. Gear you have never practiced with is gear you do not actually own.
- Prioritize items you cannot improvise. A knife, a fire starter, and a tourniquet top that list. A bandana can substitute for many things. A chest seal cannot.
Checking your tactical gear materials before purchase prevents the most common failure point: gear that looks capable but falls apart under real field conditions. Ballistic fabrics and reinforced stitching are the markers of gear built for actual use.
Recommended pre-built kits and customization tips for survivalists
Pre-built survival kits range from $12 for basic water purification setups to $160 or more for professional-grade 72-hour systems with 60 or more tools. Price signals quality, but it does not guarantee it. A $100 kit stuffed with low-grade compasses and flimsy knives is worse than a $60 kit built around three excellent tools.
Here is how to evaluate any pre-built kit before you buy:
- Check the knife first. If the blade is not full-tang, the kit is not serious. A partial-tang knife breaks under hard use.
- Verify the fire-starting tools. A kit that ships only with matches is incomplete. Look for a ferro rod as standard equipment.
- Inspect the medical supplies. A basic first aid kit is not a trauma kit. Confirm the presence of a tourniquet and hemostatic gauze if the kit claims defensive capability.
- Test the bag or case. Zippers, stitching, and fabric quality determine whether the kit survives the conditions you will carry it into.
- Identify what to replace immediately. Pre-made kits often prioritize marketing appeal over functionality. Plan to swap out the compass and knife for trusted brands within the first week.
Customization priorities depend on your environment and threat level. A survivalist operating in the Pacific Northwest needs waterproof everything and a reliable fire starter above all else. A survivalist in an urban environment needs communication tools, a trauma kit, and cash in small bills. Build your base kit first, then add environment-specific layers.
Maintenance is non-negotiable. Medications expire. Batteries drain. Ferro rods wear down. Set a calendar reminder every six months to inspect and refresh your kit. A kit that sat untouched for two years is a kit with unknown reliability.
Key Takeaways
A defensive gear survivalist kit succeeds when it balances non-negotiable tools, controlled weight, and fast-access organization built for the specific threats you are most likely to face.
| Point | Details |
|---|---|
| Fixed-blade knife is non-negotiable | A full-tang knife handles defense, food prep, and shelter tasks that no other tool replaces. |
| Weight discipline preserves mobility | Keep 72-hour kits at 20–35 lbs to stay effective during sustained evacuation. |
| SCARE kits serve a distinct purpose | Conflict-focused kits prioritize trauma gear and defensive tools over general disaster supplies. |
| Organization beats item count | Color-coded, labeled compartments let you find critical gear in seconds under stress. |
| Customize after buying pre-built | Replace low-quality knives and compasses in pre-made kits with proven, trusted gear. |
What I have learned from building and testing these kits
The most common mistake I see is treating kit weight as an afterthought. Survivalists spend hours researching the best knife or the right water filter, then pack everything into a bag they have never actually carried for more than ten minutes. Weight is not a secondary concern. It is the variable that determines whether your kit helps you or slows you down when it counts.
The second lesson is harder to accept: most pre-built kits are assembled for the shelf, not the field. The knife looks good in the packaging. The compass has a nice finish. Neither performs under real conditions. I always tell people to buy a pre-built kit as a starting framework, then immediately replace the knife and compass with gear they have researched and tested. That approach saves money compared to building from scratch while still delivering a kit that actually works.
Organization is the factor most people overlook entirely. I have watched experienced outdoors people dig through a pack for two minutes looking for a tourniquet during a training scenario. Two minutes is an eternity in a real emergency. Color-coded pouches and labeled compartments are not a luxury feature. They are a functional requirement. If you can find your trauma supplies in the dark with one hand, your kit is organized correctly.
Finally, practice changes everything. A ferro rod you have never used in the rain is not a fire-starting tool. It is a piece of metal. Spend an afternoon with your kit in conditions that are actually uncomfortable. You will learn more in three hours of practice than in three weeks of reading.
— Cody
Fs9tactical gear built for real defensive preparedness
Survivalists who want a pre-built foundation that does not require immediate replacement should look at what Fs9tactical has assembled for field use.
The 60-in-1 Tactical Emergency Kit from Fs9tactical delivers over 60 tools in a compact, organized package built for 72-hour scenarios and bug-out situations. The kit is designed around the same principles covered in this article: multifunctional tools, fast-access organization, and durable construction that holds up in harsh conditions. For survivalists who want to expand their carry system, the military tactical backpack and the Rapid-Interception Trauma Dump Pouch add organized, accessible storage for trauma gear and field tools. Fs9tactical backs all of this with thousands of five-star reviews from survivalists who have used the gear in real conditions.
FAQ
What is a defensive gear survivalist kit?
A defensive gear survivalist kit is a curated collection of tools and supplies focused on self-protection and survival in emergencies or high-threat environments. It typically includes a fixed-blade knife, fire-starting tools, trauma medical supplies, shelter materials, and water filtration.
How heavy should a survivalist kit be?
A 72-hour survivalist kit should weigh between 20–35 lbs to maintain mobility during evacuation. Exceeding that range reduces your effectiveness and increases exhaustion under stress.
What is a SCARE kit?
A SCARE kit is a specialized defensive survival kit designed for conflict avoidance during civil unrest. It prioritizes trauma gear and defensive tools over the general disaster supplies found in standard bug-out bags.
Should I buy a pre-built kit or build my own?
Pre-built kits work as a starting framework, but the knife and compass in most kits should be replaced immediately with higher-quality alternatives. Building your own kit gives you full control over item quality and weight.
What items should I never leave out of a survivalist kit?
A full-tang fixed-blade knife, a ferro rod, and a tourniquet are the three items that cannot be improvised or substituted in the field. Every other item in the kit is secondary to these three.
