

Weatherproof Tactical Accessories DIY Guide for Field Use
Weatherproof tactical accessories are defined as gear items treated or constructed with water-resistant materials and coatings to maintain function in rain, mud, and extreme temperatures. This weatherproof tactical accessories diy guide covers the three core coating technologies, PU, TPU, and PVC, along with construction techniques and maintenance routines that outdoor professionals and DIY builders rely on. Getting this right means your pouches, holsters, and enclosures survive the field instead of failing at the worst moment. Fs9tactical builds its gear around these same principles, using ballistic fabrics and reinforced stitching trusted by over 20,000 users across the U.S.
What materials and coatings work best for DIY weatherproof tactical accessories?
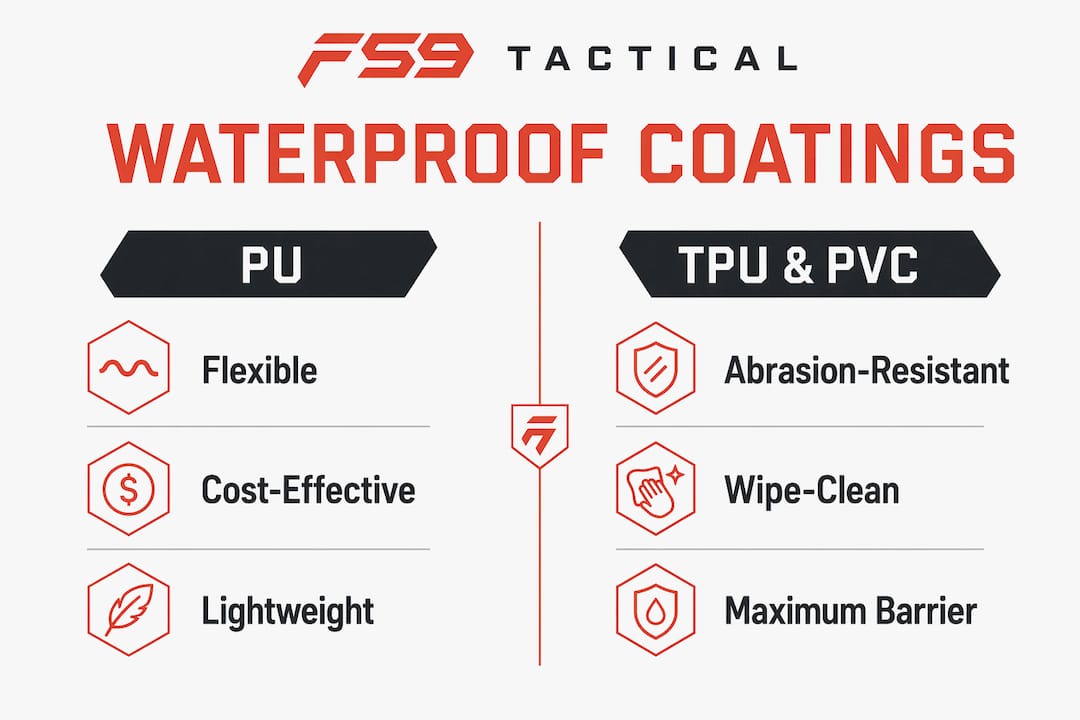
PU, TPU, and PVC are the three main waterproof coating technologies for tactical gear, each with distinct tradeoffs in cost, durability, and flexibility. Choosing the wrong one for your project means either a pouch that cracks in cold weather or a wrap so heavy it slows you down.
PU, TPU, and PVC: what each coating actually does
PU (polyurethane) is flexible and cost-effective, making it the go-to choice for general-duty pouches and wraps. It bonds well to Cordura fabric and holds up through moderate abrasion. The tradeoff is that PU degrades faster under prolonged UV exposure compared to the other two options.
TPU (thermoplastic polyurethane) offers better abrasion resistance and a wipe-clean surface. It costs more than PU but handles rough contact with rocks, brush, and gear better. TPU is the right pick for holster wraps and drop-leg pouches that take constant friction.
PVC (polyvinyl chloride) delivers the maximum waterproof barrier of the three. PVC coatings are heavier and may stiffen in cold environments, which limits their use in cold-weather operations. Reserve PVC for static storage pouches or enclosures that don’t need to flex.
| Coating | Best use | Weight | Cold-weather flex | Cost |
|---|---|---|---|---|
| PU | General pouches, wraps | Light | Good | Low |
| TPU | Holsters, high-friction gear | Medium | Good | Medium |
| PVC | Storage enclosures | Heavy | Poor | Low |
Fabric choice matters just as much as coating. Cordura nylon is the standard textile for DIY tactical accessories because it accepts adhesives cleanly, resists tearing, and pairs with all three coatings. For lighter builds, ripstop nylon with a PU laminate works well on smaller pouches and accessory wraps.
Waterproof sprays add a secondary layer of protection over any base fabric. They must be compatible with the underlying coating. Silicone-based sprays work on most synthetics, while fluoropolymer sprays bond better to woven nylons. Layering sprays reinforces seams and prolongs waterproofing efficacy, especially at stress points.
Pro Tip: Test your spray on a scrap piece of the same fabric before applying it to finished gear. Incompatible sprays can cloud coatings or reduce adhesion.
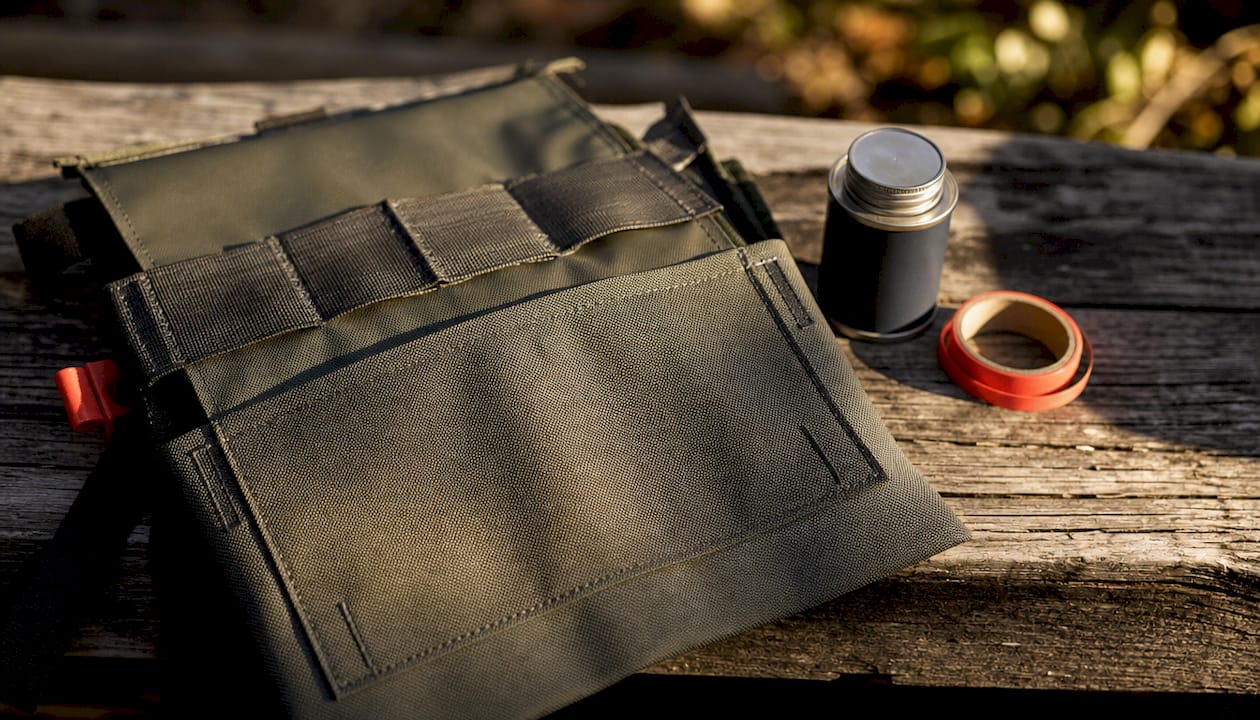
What tools and prep steps do you need before building?
Good surface preparation separates professional results from peeling, bubbling failures. Cleaning with isopropyl alcohol removes factory oils that block adhesive bonding on tactical gear modifications. Skip this step and your wrap will lift within weeks.
Essential tools for the job
- Sharp cutting blades: Fresh razor blades or a rotary cutter give clean edges. Dull blades drag fabric and create frayed cuts that let water in.
- Isopropyl alcohol (90%+): Wipe every surface before applying adhesive. Let it dry fully before proceeding.
- Contact cement or specialty fabric adhesive: Choose a flexible, waterproof-rated adhesive. Rigid glues crack under field stress.
- Sewing supplies: Heavy-duty thread (size 69 or 92 bonded nylon), a curved needle for tight corners, and a seam ripper for corrections.
- Seam sealing tape: Iron-on or brush-on tape covers stitching holes after sewing.
- Clamps and binder clips: Hold seams flat while adhesive cures.
Workspace and safety setup
Work in a ventilated space. Contact cement and isopropyl alcohol both produce fumes that build up fast in enclosed areas. A folding table covered with a silicone mat protects surfaces and gives you a flat, clean work area. Keep a cutting mat under all blade work.
Cordura fabric and specialty adhesives for DIY holster wraps cost between $8 and $24 per yard or sheet, making custom gear protection genuinely affordable. Buying fabric in half-yard increments lets you test cuts and techniques before committing to a full project.
Pro Tip: Cut a paper template of your accessory before touching fabric. Fitting the template first catches sizing errors that would waste expensive Cordura.
How to assemble and waterproof common tactical accessories step by step
Wrapping a holster with Cordura
- Clean the holster surface with isopropyl alcohol. Let it dry for five minutes.
- Cut your Cordura to size using a paper template. Add half an inch of overlap on all edges.
- Apply contact cement to both the holster surface and the fabric back. Wait until both surfaces are tacky, roughly two to three minutes.
- Press the fabric onto the holster starting from the center and working outward. Smooth firmly with your thumb to eliminate air pockets.
- Make small relief cuts at corners and curves so the fabric lies flat without bunching.
- Fold and glue the overlap edges to the inside of the holster.
- Apply seam sealing tape along all folded edges as a final waterproof barrier.
Sharp blades and patient application produce better fabric wrapping results, minimizing bubbles and edge lifting. Rushing the adhesive cure time is the single most common mistake.
Building a waterproof pouch
Cut your coated fabric panels to size, leaving a quarter-inch seam allowance. Sew panels together with bonded nylon thread using a straight stitch at 8–10 stitches per inch. After sewing, seal every seam with compatible waterproof tape or flexible fabric glue to prevent water ingress at stitching holes. Install a waterproof zipper by gluing the zipper tape to the fabric before sewing, then sealing the stitch line. Reinforce stress points at zipper ends and strap attachment points with bar tacks or extra adhesive.
Building a weatherproof electronic enclosure
For gear that houses electronics, the enclosure needs IP65 or higher rated housing with hydrophobic PTFE membrane vents to maintain ingress protection while allowing ventilation. Use two vents, one for intake and one for exhaust, to enable passive cooling without letting moisture in. Seal all cable entry points with waterproof grommets and silicone sealant. Place desiccant packs and moisture indicator cards inside the enclosure to detect and control humidity during field use.
Common pitfalls and fixes
- Bubbles under fabric: Press out with a credit card immediately after application. Once cured, bubbles require cutting, re-gluing, and re-sealing.
- Lifting edges: Reapply contact cement under the lifted section, clamp, and let cure for 24 hours before field use.
- Leaking seams: Add a second pass of seam tape on the inside of the pouch. Brush-on seam sealer reaches tight corners that tape cannot.
- Stiff fabric in cold weather: Switch from PVC to TPU or PU coating for any gear used below freezing.
What maintenance steps extend the life of DIY weatherproof tactical gear?
Regular application of waterproofing sprays and maintenance of worn seams and straps adds years of functional life to tactical gear without replacement costs. This step is frequently skipped, and it shows up as delaminating fabric and leaking seams after a single hard season.
Routine care checklist
- Inspect all seams and edges after every field use. Look for lifting adhesive, frayed thread, and cracked coating.
- Reapply waterproof spray every three to four months, or after any extended exposure to rain or mud.
- Clean gear with mild soap and cold water. Hot water and harsh detergents break down PU and TPU coatings faster than field use does.
- Check zipper teeth for debris. Lubricate with a zipper wax stick to maintain a water-resistant seal.
- Replace desiccant packs in enclosures when moisture indicator cards change color.
For cleaning and maintaining tactical gear, the same principles apply across fabric types: gentle cleaning, air drying, and prompt repair of any damage before it spreads.
Pro Tip: Store DIY tactical accessories flat or hanging, never compressed under weight. Compression creases coated fabrics and breaks the waterproof layer along fold lines.
Repairing a frayed seam costs five minutes and a needle. Replacing a pouch that failed in the field costs far more. Build the inspection habit into your post-mission routine and your gear will outlast the projects you built it for.
Key Takeaways
Choosing the right coating and preparing surfaces correctly determines whether DIY tactical gear lasts one season or five.
| Point | Details |
|---|---|
| Match coating to use case | PU suits flexible pouches; TPU handles high-friction holsters; PVC works for static storage only. |
| Surface prep is non-negotiable | Clean all surfaces with isopropyl alcohol before adhesive application to prevent peeling. |
| Seal every seam after sewing | Apply waterproof tape or brush-on sealer to all stitch lines to block water ingress. |
| Maintain on a schedule | Reapply waterproof spray every three to four months and inspect seams after every field use. |
| Electronics need IP65 and PTFE vents | Weatherproof enclosures require rated housings and hydrophobic membrane vents for safe ventilation. |
What I’ve learned from years of building DIY tactical gear
The biggest mistake I see from new builders is treating waterproofing as the last step. They build the pouch, sew the seams, and then spray the outside and call it done. That approach fails at the first seam. Waterproofing has to be built into every layer: the fabric choice, the adhesive, the seam tape, and the final spray. Miss one layer and water finds it.
The cost advantage of DIY is real, but only if you invest in the right materials upfront. Cheap contact cement that isn’t rated for outdoor use will peel in the first rain. Spending an extra few dollars on bonded nylon thread and proper seam tape saves you from rebuilding the same pouch twice.
Weight and flexibility are the tradeoffs nobody talks about enough. PVC gives you a bulletproof water barrier, but if your pouch stiffens in a cold morning and you can’t open it quickly, the waterproofing is irrelevant. I always test finished gear in cold water before trusting it in the field. Fill the pouch, submerge it for ten minutes, and check the inside. That test tells you more than any visual inspection.
The durable materials checklist from Fs9tactical is a solid reference point for anyone sourcing fabrics and hardware. Their approach to ballistic fabrics and reinforced stitching reflects the same principles that make DIY builds last.
— Cody
Fs9tactical gear built for when DIY isn’t enough
Some missions call for gear that’s already been tested, rated, and field-proven before it ships. Fs9tactical builds weather-resistant accessories for hunters, shooters, and survivalists who need reliability without the build time.
The 60-in-1 Tactical Emergency Kit covers 72-hour field preparedness in a single package. For organized carry, the multi-field accessory pouch and the tactical gear bag handle everything from tools to medical supplies in weather-resistant construction. Fs9tactical is the second-largest soft rifle case manufacturer in the U.S., and that same build quality runs through every accessory in their catalog. Browse the full range at Fs9tactical.com and find gear that performs on day one.
FAQ
What is the best waterproof coating for DIY tactical pouches?
TPU is the best all-around coating for DIY tactical pouches because it resists abrasion, wipes clean, and stays flexible in cold conditions. PU works well for lighter builds where cost is the priority.
How do I seal seams on a DIY waterproof tactical accessory?
Apply iron-on or brush-on waterproof seam tape over every stitch line after sewing. Brush-on seam sealer reaches tight corners and zipper ends that tape cannot cover.
How often should I reapply waterproofing spray to tactical gear?
Reapply waterproofing spray every three to four months under normal use, or immediately after extended exposure to rain, mud, or saltwater. Layering sprays at seams extends protection between full applications.
What does IP65 mean for a DIY tactical enclosure?
IP65 means the enclosure is fully dust-tight and protected against water jets from any direction. Achieving IP65 in a DIY build requires a rated housing and hydrophobic PTFE membrane vents at any ventilation points.
Can I waterproof existing tactical gear without rebuilding it?
Yes. Clean the gear with isopropyl alcohol, apply a compatible waterproofing spray, and seal any worn seams with brush-on seam sealer. This approach restores water resistance without disassembly and works on most coated nylon and Cordura gear.
